Although it’s easier than ever to buy marijuana online, some users might want to try growing cannabis at home. Although it can take a few months to successfully grow marijuana plants, it’s a highly interesting and rewarding project for marijuana lovers. Plus, you can even harvest and sample your homegrown weed.
With that said, growing cannabis isn’t as simple as planting your seeds and waiting for the buds to sprout. It’s a long and complex process and every stage of growth needs to be handled with care. The cannabis flowering stages are particularly important as this is when your plants will start to produce marijuana buds.
The flowering stage begins once the light cycle for your cannabis plants changes. Initially, cannabis plants should be given around 18 hours of light a day to help them grow. After four to six weeks, they’ll need longer periods of darkness (usually 12 hours a day) and more nutrients. This transition often happens naturally when growing cannabis outdoors, but indoor growers manually initiate the flowering stage.
Once the flowering stage starts, your cannabis plants will begin to grow faster. They’ll also start to produce the rich marijuana flowers you’re looking for. As such, you should know what to do each week of the flowering stage. Here’s a week-by-week guide to cannabis flowering stages.
How To Start Growing Your Cannabis Plants
While the flowering stage starts around four to six weeks into growing cannabis, it helps to give them a good start. As such, you should make sure you do everything right from the beginning. You should make sure you use feminized seeds to ensure you grow female cannabis plants. These are the plants that produce marijuana, and male plants can often hinder their growth.
You should also germinate your seeds before you plant them. You can do so by placing your seeds between two layers of damp paper towels. You can then sandwich the damp paper towels between two dishes to enclose your seeds in darkness. Check on the seeds regularly and, within a few days, they should sprout stalks.
After germinating your seeds, you’ll need to carefully transplant them to plant containers. Fill your containers with soil and place the seeds around an inch deep. Make sure you give them plenty of water to keep the soil moist. It also helps to use water or soil enriched with nitrogen, potassium, phosphorus, and calcium.
If you’re growing cannabis indoors, your plant containers should be kept in a designated growing space. Using a small room, closet, box, or tent allows you to control the temperature, light, and humidity of the growing area. Some users prefer to grow their plants outdoors – this is a viable option when the weather is good but gives you less control over the growing conditions of your plants.

Pre-Flowering Stage
Once you’ve planted your seeds and placed them in your growing space, it’s important to give your plants the right conditions. In the initial stages of growing – before your plants start to flower – they’ll need longer periods of light and shorter periods of darkness. If you’re growing your plants indoors, you should give your plants 18 hours of light a day using artificial lights.
Giving your plants the right levels of heat and humidity can also help improve their growth. In the early growth stages, the ideal temperature for your plants is around 21 – 24°C. Indoor growers usually control the temperature of their grow space by using an air conditioning unit or even using heaters and fans.
Your plants should also be given relative humidity levels of around 60 – 70%. Usually, it’s best to start high and reduce the humidity levels by around 5% each week. You can control the humidity levels of your growing space by using a humidifier. Make sure you also give your plants adequate water and nutrients.
The pre-flowering stage usually lasts for around four to six weeks, giving your plants plenty of time to root and get healthy before the flowering stage begins. While outdoor growers usually need to wait for the weather to change, indoor growers can initiate the flowering stage by changing the conditions they give to their plants.
Week One
If you’re growing cannabis indoors, you can initiate the flowering period by giving your plants 12 hours of light and 12 hours of darkness a day. You should also reduce the temperature of your growing area to around 18 – 21°C and reduce the relative humidity levels to around 40 – 50%. This will result in huge changes for your plants.
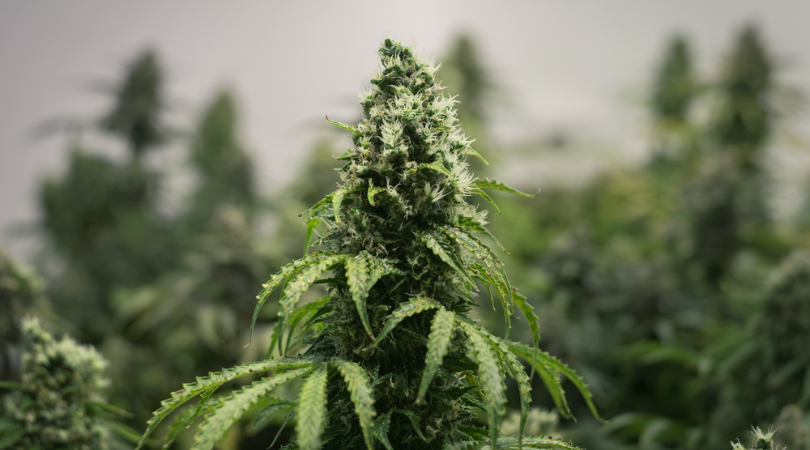
In the first week of flowering, you’ll notice a huge growth spurt in your plants. It’s often referred to as the stretch period as cannabis plants start to grow much taller. Some plants grow up to double their height and you’ll also see new branches and leaves sprout throughout your plants.
Since your plants grow exceptionally quickly during this time, they’ll have an increased need for nutrients. Many growers feed their plants by adding a cannabis nutrient mix to their water. That way, you can ensure that your plants get the water and nutrients they need at the same time.
Your plants usually won’t start growing buds in the first week. However, if you’re using regular seeds, you might notice male plants growing pollen sacs. If you notice any male plants, you should remove them to ensure they don’t hinder the growth of your female plants. You should also watch out for anything else that might ruin your plants, such as mold or pests.

Week Two
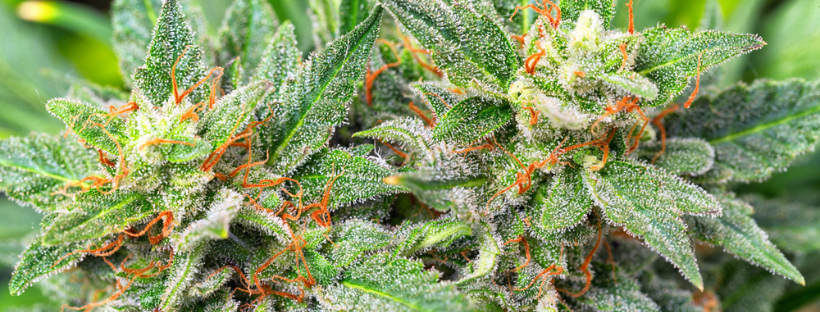
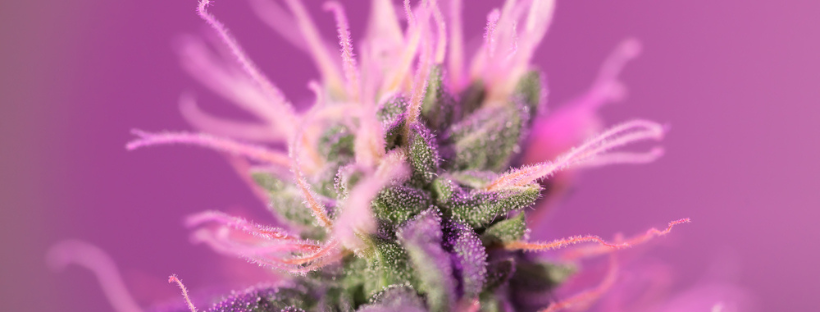
In the second week of flowering, you’ll start to see more important changes in your plants. In week two your plants will usually start developing pistils. These fine hairs are usually white and wispy, but they’ll soon develop and change in color. If you notice plants growing pollen sacs instead of pistils, remove them from your growing area.
Week two of flowering is a good time to start changing how you feed your plants. Instead of feeding them growth nutrients, you should switch to flowering nutrients. Cannabis nutrient manufacturers usually provide instructions on how to feed your cannabis plants appropriately during the flowering stage.
Feeding your plants with flowering nutrients will enhance their growth and your plants will soon start to develop buds. Continue to keep a close eye on them and mitigate any problems. You should also continue to give your plants the same levels of light, heat, and humidity as in week one.
Week Three
While your plants will show plenty of upwards growth in the first two weeks of the flowering stage, this will start to slow down by week three. You might even notice the upwards growth of your plants coming to a halt. However, this isn’t a bad thing – it means that your plants will start to grow flowers instead.
You’ll notice your plants growing more leaves and branches. While you probably won’t see any fully-grown buds yet, you might notice small “budlets” start to form on your plants. Make sure you continue to give your plants adequate levels of flowering nutrients – cannabis nutrient mixes should give you instructions on how much they need.
You should also check the leaves of your plants for any issues. Discolored or yellowing leaves should be removed as these can cause problems for the rest of your plants. If the tips of the leaves become discolored, this could be a sign of nutrient burn. As such, you should slow down on feeding your plants with nutrients if you notice this.
Week Four
If your plants didn’t stop growing upwards in week three, they should have fully stopped in week four. At this point, the plants will be spending all of their energy on producing buds. You might still see small white pistils, but you should also notice budlets becoming thicker and denser throughout the week.
The buds of your plants may even start to develop trichomes. These are the glands where cannabinoids such as THC and CBD are produced – although they need time to develop. Trichomes are also responsible for the production of terpenes – the aromatic compounds that contribute to the smell and taste of your plants. As such, the odor of your plants will become more noticeable.
As the buds of your plants grow thicker, they may start to weigh the plant down. Try to support them by holding them up and ensuring they continue to grow outwards. You should continue to check for yellowing or discolored leaves. You should also look out for signs of nutrient burn. You might even want to cut a few extra leaves to ensure more energy is spent on growing buds.
Week Five
By week five of the flowering stage, you should start to see thick, luscious buds growing throughout your cannabis plants. This is an excellent sign as it shows that, within a few weeks, your plants will be ready to harvest. Continue to check for any flaws in the leaves or buds of your plants.
As the buds of your plants grow, you’ll start to see more crystal-like trichomes developing. You should keep a close eye on these as they can indicate when your plants are ready to harvest. They should initially be clear but will start to become opaque. Once they become milky white or amber, you’ll know that your plants are ready for harvest.
You should also keep a close eye on the pistils or hairs of your plants. They will start to become darker and change to a brownish or amber color. When most of the hairs have become amber, it’s a good sign that your plants are ready to harvest. However, this point will usually come a few weeks later.
Week Six
Usually, cannabis plants are ready to harvest by week seven or eight of the flowering stage. As such, you should make a few changes during week six. Now is a good time to stop feeding your plants nutrients. Instead, you should only give them pH-balanced water. This process is known as “flushing” your plants and it helps improve your buds by flushing salts and minerals out of the soil.
You can also lower the temperature and humidity of your growing area. While plants in the flowering stage usually need temperatures of 18 – 21°C and humidity levels of 40 – 50%, you can lower the temperatures by around 2°C and lower the humidity levels by around 5% within two weeks of harvesting.
Continue to examine the trichomes of your plants to assess whether they’re ready for harvest. You might want to use a magnifying glass to examine them closely. Usually, the best time to harvest your plants is when the trichomes have become milky white or amber. It’s also a good sign if most of the pistils have darkened.
Week Seven To Eight
You shouldn’t change much in your approach during the last few weeks of flowering. At this point, your plants will be reaching the end of the flowering stage. As such, you should continue to keep a close eye on the trichomes and pistils so that you know when your plants are ready to harvest.
Once your plants are ready to harvest, you should carefully cut the branches and place them on a drying rack or drying tray in another room. You should keep your drying room at a relative humidity level of 50 – 60% to avoid your buds becoming damp or moldy. It usually takes around three to ten days to dry your cannabis buds.
After harvesting and drying your buds, they’re ready to use. However, many people choose to cure their buds before using them. This involves filling glass jars with your dried buds and keeping them in a cool, dry place for at least two to four weeks. The jars should also be opened regularly for the first few days to release excess air.
Conclusion
Growing cannabis can take a long time and you’ll need to take good care of your plants throughout the process. The flowering stages are particularly important as this is when your plants will start to grow rich marijuana buds.
Fortunately, you don’t need to wait months to use cannabis even if you’re currently growing it. You can always order cannabis flower strains, concentrates, edibles, vapes, and more at Low Price Bud.